Tuesday, January 26, 2010

After some debugging, I have figured out what was the issue with the lamp matrix controller board. I was multiplexing it too fast. By lowering the frequency of multiplexing, I got the board to properly work.

Next step is to map the palette events from Pinball Fantasies into lamp on / lamp off commands for the Arduino.

Then I need to fix an issue with the intensity of lamps when they are turned on simultaneously.
After that, I need to try I2C or some other communications protocol and then build 3 more of these boards for controlling the whole playfield.

Monday, January 25, 2010

Lamp controler board, second try


Today I have rebuilt the lamp controller board taking care of placing high current lines far from low current lines in order to avoid induced currents. But that did not solve the issue.

The new board is a complete 4x4 matrix controller. It was considerably faster to build this one. I am getting used to it, it is becoming easier to build :-)


Here is a video of the current status of the project, and a question for the electronics geeks:

Sunday, January 24, 2010

This weekend, my friend Rafael Moretti spent some time with me buying electronics materials and starting to build and test a lamp controller board for my pinball machine.

This circuit was suggested to me by another friend, DalPoz, which explained to me how the circuit is supposed to work. Thanks!

Here is a video of the board (not yet completely built yet, but already flashing 4 lamps of the playfield):


The video is in brazilian portuguese, but there are subtitles for it in english. It seems to me that, for some reason, YouTube does not show subtitles for embedded videos, so you might want to watch the video
directly in YouTube here (with subtitles)

Thursday, January 14, 2010


Yesterday i have installed the decorative acrilics that for the upper loop of my pinball machine.


The acrylic parts are 29 milimiters above the playfield, the exact height of the posts I decided to use (the one I have modeled in FreeCad). I have chosen this one because it is higher than the diameter of the ball, so that the ball will not touch the acrylic parts which are fragile (unless it jumps for some reason). So, I'll need something to guide the ball in the upper loop. I though of using metal guides, but I need advice on that. What would you suggest?


More photos at http://www.flickr.com/photos/felipesanches

Monday, January 11, 2010

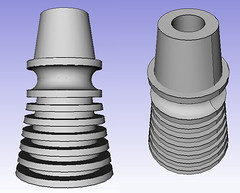
Today I have started to learn how to use FreeCAD. My first exercise was drawing a 3d model of a pinball post similar to these ones. Here it is:

3d model of a pinball ribbed post


The CAD file is here, released under public domain.

Friday, January 08, 2010

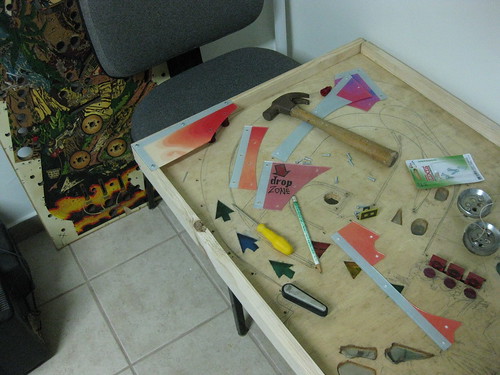
This week I have been preparing acrylic parts for my pinball machine. The parts were drawn in Inkscape (both the artwork of the parts and their shape). I have sent the shapes to be laser cut in acrylic. The artwork was printed in 4 A3 sheets of paper in a professional print shop.

There are some photos of the results here:

Laser-cut acrylic parts


An acrylic part and its printed artwork


One acrylic part with art ready to be installed in the machine


Also, this week I have discovered Jeri Ellsworth, a pinball-geek girl who is also notable for some other hacks. She's building a pinball machine and posting videos on her youtube channel. Check out this live streaming of her lab. There's an IRC bot to control the webcam zoom and angles and also a text-to-speech bot.

She's recently posted a video explaining how to make coloured pinball parts using fabric dye. I will probably try to do that with the flipper rubber bands of my pinball which are black but were supposed to be red.